What is Gravatar?
When you see a post on a site you can see users having profile pictures near their name while commenting or at the end of the post which looks amazing these profile pictures are kept using gravatar in wordpress. Gravatar stands for Globally Recognized Avatar and it is a plugin used in wordpress to provide the service to keep a profile picture. To know more click here.
How to use Gravatar?
If you want to use gravatar to keep a profile picture to make it look unique and amazing, follow the steps below without missing any single step.
If you are an author of a site your dashboard will look like the picture below.

Step-1(Finding gravatar in the site)
Gravatar comes under the profile menu where you can set things related to your profile. After clicking on the profile navigate the profile picture by scrolling down.

Step-2(Opening gravatar)
In the previous step, you have navigated the profile picture. In my case, you can see in the above picture I have already kept the profile picture so it’s not showing to set the picture rather it is showing to change the profile picture. It will be the same step as in both cases we have to use gravatar in the same way.
Click on the text in blue as in my case it is “you can change your profile picture on Gravatar.” It will automatically redirect you to Gravatar’s official site. Find Sign in option at the top right corner of the site and click on it.

Step-3(Log in)
In the previous step, you have clicked on the Sign in option which has already opened the wordpress sign in page where you have to sign in using the email id and password provided to you to open the wordpress site. Use the same login credentials here and sign in.

Step-4(Adding image)
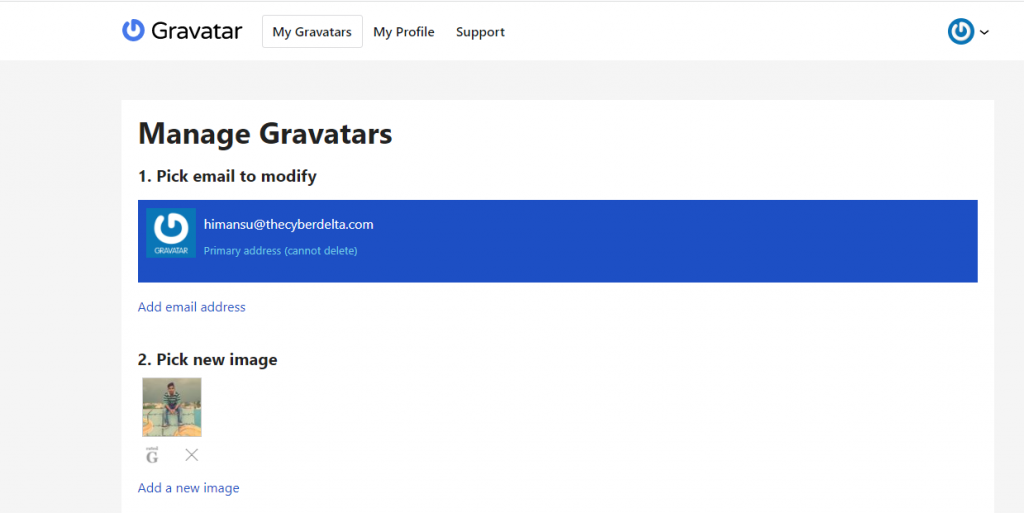
In the previous step, you have already logged into the gravatar using wordpress login credentials which have opened the dashboard if you have entered the right credentials, or else try again with the correct credentials.
In the dashboard, there is an option to add an image click on that it will open a page where you can upload an image from your computer, from an URL, and from a past upload. Select it according to your requirement and click on next.
It will say to crop the image, crop it as per the requirement and click on crop image. Rate your image which will now be called an avatar according to the image generally select the G rating and click on set rating.

Step-5(Final step)
In the previous step, you have uploaded the avatar now it must be showing on the gravatar dashboard.
NOTE: You can upload multiple files but one at once and select a single avatar from the uploaded image.
Select the avatar and click on confirm now it’s done your profile picture will take 5-10 mins to get updated on the site which will look cool now.
Hope this helps you to change or set up a new avatar. Even if you encountered any problem in this then you are welcome to fill out the contact us form to contact us we will surely help you out with that. Thank you!.


